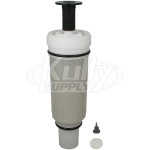
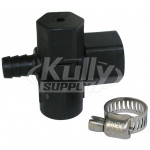
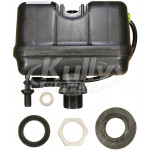
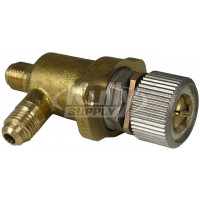
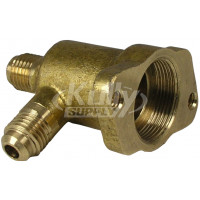
Items Included
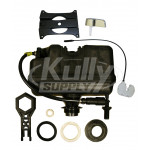
- Flushmate Vessel
- Flush Cartridge
- Flush Actuator (black plastic)
- Flush Actuator Set-Screw
- Upper Supply with Duckbill Valve and Vacuum Breaker
- Hose Clamp for Upper Supply
- Supply Hose (Upper to Lower Supply)
- 90 Degree Lower Supply with Built-In Regulator (35 psi) and Back-Check Valve
- Inlet Screen
- Lower Supply Nut
- Flushmate Vessel-to-Tank Nut
- Flushmate Vessel-to-Tank Gasket
- Tank-to-Bowl Gasket
- 3-in-1 Multi-Purpose Wrench
- Cartridge Actuator Mechanism Plate (black plastic)
- Plate Attachment Screws (Qty. 4)
- Crank Housing with Universal 16.5” Cable
- Chrome Plated Handle Assembly
- Handle Bushing (white plastic- fits into square handle opening in toilet tank)
- Handle Nut (white plastic)
- Handle Bushing Spacer (black plastic) (optional- for large handle openings)
- Installation Instructions
- Owner’s Manual
Description
The original “Round” 501-B Series Tank has been discontinued and replaced with this new upgraded “Rectangular” 503 Series Flushmate Tank.
The 503 Series Flushmate system provides the highest performance capability available today in the ULF (Ultra-Low Fixture) category. At just 1.6 gallons per flush, this system consumes 20% less water per flush than traditional toilets. This remarkable performance is achieved by using compressed air inside the tank, which creates a “turbo-charged” flushing action for effective bowl cleaning.
This Flushmate Kit includes the Flushmate 503 Series Handle Replacement Kit you need to replace your old style handle. The new universal-cable design allows for mounting on either left-handle or right-handle toilets, regardless of the toilet manufacturer. Installation can be completed with a Phillips Screwdriver, making installation quick and easy.
The Flushmate Multi-Purpose tool is also included. This tool will ease installation and can be used to remove the cartridge, tighten or remove the lower supply nut and remove the large nut that holds the system in the toilet tank.
This 503 Flushmate Kit fits in Two-Piece Toilets manufactured by several Toilet Brands.
This Kit Replaces:
- Serial Numbers: 111, A01, B01, F01, F0A, F0K, F3B, XXX, Z01
- All 501-A and 501-B Series Flushmate Tanks installed in Two-Piece Toilets
Note: For toilets with a Push Button activation use 162835 which is the same as this kit less handle
Features and Benefits
- Complete Replacement Tank Kit for quick and easy replacement of an existing Flushmate system.
- Handle Replacement Kit tailor-made for the Flushmate 503 series is easy to install and provides consistent performance.
- 3-in-1 Multi-Purpose Wrench for easy installation and removal of the cartridge, the lower supply nut and the large nut that holds the system in the toilet tank.
- The peak flow of pressure-assist technology is more than double that of gravity-type fixtures at 70 gallons per minute.
- Since a pressure-assist bowl does not require a siphon to extract waste, the trap dimension is the same throughout. This allows for the easy removal of waste throughout the trapway.
- Flushmate equipped toilets stay cleaner due to a large water surface area and vigorous flushing action.
- Water is contained in the Flushmate vessel, and not in the porcelain tank. The result is a non-sweating toilet, so the floor around the toilet remains dry.
- Flushmate systems are designed so that their flush volumes cannot be adjusted. The water savings are sustained for the life of the fixtures.
- Uses less than 1.6 gallons (6 liters) per flush without sacrificing performance, which saves up to 20% more water than conventional technologies.
Operation and Maintenance
How this Flushmate System Works
- The Flushmate vessel traps air, and as it fills with water, it uses the water supply line pressure to compress the air trapped inside.
- When the pressure inside the vessel reaches 35 psi it is ready to flush. (The built-in water regulator limits the pressure to 35 psi)
- When flushed, the compressed air pressure “pushes” water out of the vessel, through the toilet, and down the drain at more than two times the rate of a traditional gravity system. (A traditional toilet uses the gravity flow of the water in the tank to raise the water level in the toilet bowl until it overflows the drain spillway and creates a siphon which “pulls” the waste out of the bowl)
- The vessel then refills and is ready for the next flush.
Flushmate Cleaning and Care
Use of petroleum-based lubricants or cleaning products containing chlorine (household bleach, drop-in blocks or tablets, disinfectants) that are applied or inserted into the toilet tank and/or Flushmate vessel will void your Flushmate Limited Warranty. The exterior of the tank and the entire bowl can be cleaned following the manufacturer’s recommendations or in the same fashion as any other toilet.
With each flush, a small amount of water may be emitted from the upper supply group. A drain at the base of the Flushmate system will eliminate most of this water. Depending on usage, you may see some residual water (less than 1”) in the china holding tank. This is a normal occurrence.
Flushmate Systems are designed to be used with a cold potable water system only, and use of non-potable water supply or a tempered or hot water supply will void your warranty.
Installing a Replacement Flushmate System
- Turn off the water at the supply stop. Flush the toilet to relieve water and air pressure from the Flushmate system.
- Disconnect water supply line from the supply shank (bottom left-hand side of toilet tank) and remove the plastic nut that holds the supply shank in place.
- If necessary, disconnect the flush-rod from the flush-handle linkage. Remove the screws and clips that attach the flush-rod to the Flushmate vessel and use them to attach the flush rod to the new Flushmate vessel.
- Loosen the nuts on the bolts protruding from the underside of the toilet tank. These nuts should be loosened by alternating between them instead of completely removing one at a time.
- Once the nuts have been removed, lift the china tank straight up off of the bowl. Empty any residual water that may have accumulated in the china tank into the toilet bowl. Carefully set the tank down flat on its backside.
- Remove the tank-to-bowl gasket from the plastic vessel outlet and unscrew the large plastic nut. The 3-in-1 Wrench will work best for removal.
- Slide the Flushmate system out of the china tank.
- Place new vessel-to-tank gasket (flat rubber gasket with ribs on one side) on new Flushmate vessel outlet with the ribs facing downward. (Some vessel-to-tank gaskets do not have ribs; installation of this gasket is universal)
- Insert the water supply shank into the china tank as you slide the Flushmate system into the china tank.
- Place the water supply shank through the hole in the bottom of the china tank. Install the new supply shank nut on the supply shank and fully tighten the nut.
- Install the new vessel-to-tank nut onto the Flushmate vessel outlet threads and tighten the nut.
- Place the new tank-to-bowl gasket onto the Flushmate vessel outlet. Now you can place the china tank with the new Flushmate system installed back onto the toilet bowl.
- Attach brass washers and hex nuts to each bolt and tighten securely. (When tightening the tank to bowl nuts, use the alternating method while putting downward pressure on each side as you tighten the nuts on that side. You must get the bolts tight enough to prevent any leakage (when flushed) between the tank and the bowl, but not so tight that you risk breaking the china.
- Re-Install the handle and rod kit as appropriate.
- Reattach water supply line to the supply shank and turn on the water supply valve.
- Wait for Flushmate vessel to fill with water and flush the toilet.
Installing the 503 Handle Replacement Kit
Prior to Installation: Remove the existing handle and note its orientation. The new handle should be installed facing the same direction. If you have a flush rod, clips, and screws, remove them before you start.
- Remove the Handle Nut using a pliers. The nut has a left-hand thread (clockwise to loosen and counter-clockwise to tighten).
- Remove the handle by guiding it through the opening of the toilet tank.
- Place the black spacer and bushing into the hole of the toilet tank. If the black spacer is too big for the hole, remove and re-insert the bushing without the spacer.
- On the inside of the toilet tank, hand-tighten the handle nut snug around the bushing by turning counter-clockwise.
- Orient new handle in the same direction as the original handle. Insert into place until the stem of the handle extends past the bushing or until you hear/feel it click into place.
- Gently remove the disposable cap from the barrel end of the cable. Discard the cap.
- Lift the lever and push the barrel end of the cable up through hole on underside of the black plastic frame until it clicks into place.
- Guide the cable end into the lever slot.
- Raise the lever to seat the white barrel into catch until it clicks.
- Position the frame and lever with the cable facing the front of the toilet tank and secure with the 4 screws (rest the white cassette on the side of the tank). The toilet may begin to flush and run while you tighten screws and secure frame.
- Match the handle icon on the white cassette to the direction of the toilet handle and lift handle to horizontal position.
- Maintain alignment of the cassette, and guide it down over the protruding handle stem until it clicks into place.
- Gently push the handle to test movement. If the handle doesn’t move properly, revisit the part orientation.
- To begin the flush-lever alignment, hold the actuator in place and loosen the set screw
- Adjust the black actuator height to align the lever and frame. (Turn counter-clockwise to position the actuator higher or clockwise to position lower)
- Once properly aligned, hold the actuator in place and tighten set screw to secure.
- Place toilet lid back onto the toilet tank.
Warranty Info
5 Year Limited Warranty
Codes & Standards
WaterSense – Meets EPA Criteria
Product Message
Please note: The lower supply will be attached to the vessel for shipping. This supply must be removed from the peg on the vessel prior to installation.
Flushmate systems will NOT work in traditional gravity fed toilets. Flushmate equipped toilets have specially designed water passageways in the bowl, and the bowl outlet has a completely different design which is much more open than traditional toilet bowls.
Manufacturer Info
Sloan FLUSHMATE® is a division of Sloan Valve Company. FLUSHMATE manufacturers high-performance, water saving pressure-assisted toilet flush systems. Those systems are then installed in toilets manufactured by OEM brands such as Gerber, Mansfield, American-Standard, and Crane.
To contact Flushmate directly please call 1-800-533-3460
You can also visit Flushmate’s website directly for Product Registration, to view Warranty Info, to view Recall Info, or Contact Flushmate.
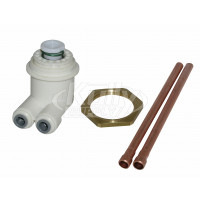 List Price: $80.00 You Save 1%
